How to Easily Remove a Wooden Window and Frame
Get ready to learn everything about taking out windows, from the names of the parts to average cost savings.
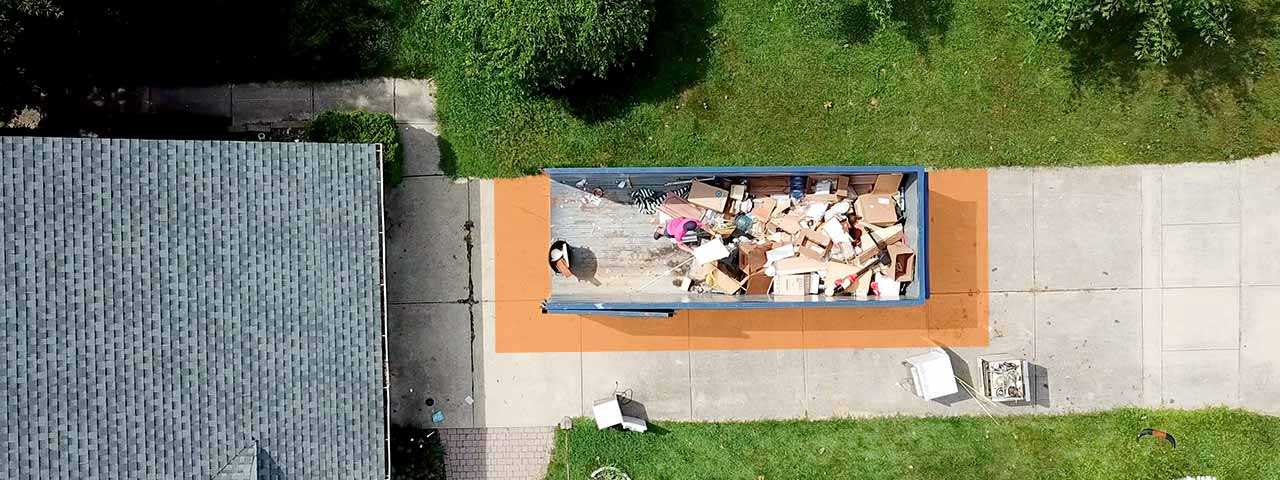
Make cleanup a breeze with a roll off dumpster:

Your Step-By-Step Guide to Taking Out a Window
Are you hit by some cold air when you walk past your windows? Is opening your windows so hard it feels like a workout?
When your windows are more trouble than they’re worth, it might be time to replace them. Unfortunately, wood window replacement is not one of the cheaper home improvements out there. On average, replacement costs $575 per window. The majority of that price comes from labor.
Opting to remove the windows yourself can significantly cut down your expenses. However, don't feel pressured to DIY this project simply because you'll save money. If you don’t feel safe taking the window out, consider hiring a professional. With that said, if you have experience with home repairs and are feeling up to it, here's what you'll need to do.
Wooden Window Removal FAQs
How much does window removal cost?
Window removal costs $575 per window on average. The price will change based on the size of the window, material and style (bay, single hung, sliding, egress, etc.).
What material is my window made of?
The most common window materials are wood, vinyl and aluminum. Generally speaking, older homes tend to have wooden windows, while homes built after the early 1970s will generally have vinyl windows. As for aluminum frames, they are most likely to be found in areas where sound pollution is a major issue due to their superior soundproofing ability.
Will removing my window damage the wall?
If you are careful when performing the job, it’s possible to completely avoid any marks on your wall. The key is to take your time when removing parts that physically attach to your wall. If you do that, the only marks will be from the nails or screws into the studs, which will be covered when you either install new windows or drywall over the area.
How should I dispose of my windows?
If you have a lot of windows to toss, consider renting a dumpster. Our 10 yard dumpsters are an ideal solution to get rid of all the windows at one time.
Your windows most likely will not be collected curbside and are not often accepted as donation. It’s possible for you to recycle your old windows, but most places will only accept the individual materials. If you have the time to break the window down, recycling may be a great option for you.
Ready to get a dumpster? Place your order online today.
Order a Dumpster Online
Shopping after hours? Too busy to make another call? Book the dumpster you need, when you need it. Order your dumpster online 24/7.

6 Steps: Remove Your Old Wood Windows
Ready to take out your windows? We’re here to guide you. Clear a few hours out of your schedule if you’re a beginner and then dive into step one to get going.
1. Learn the Parts of a Window
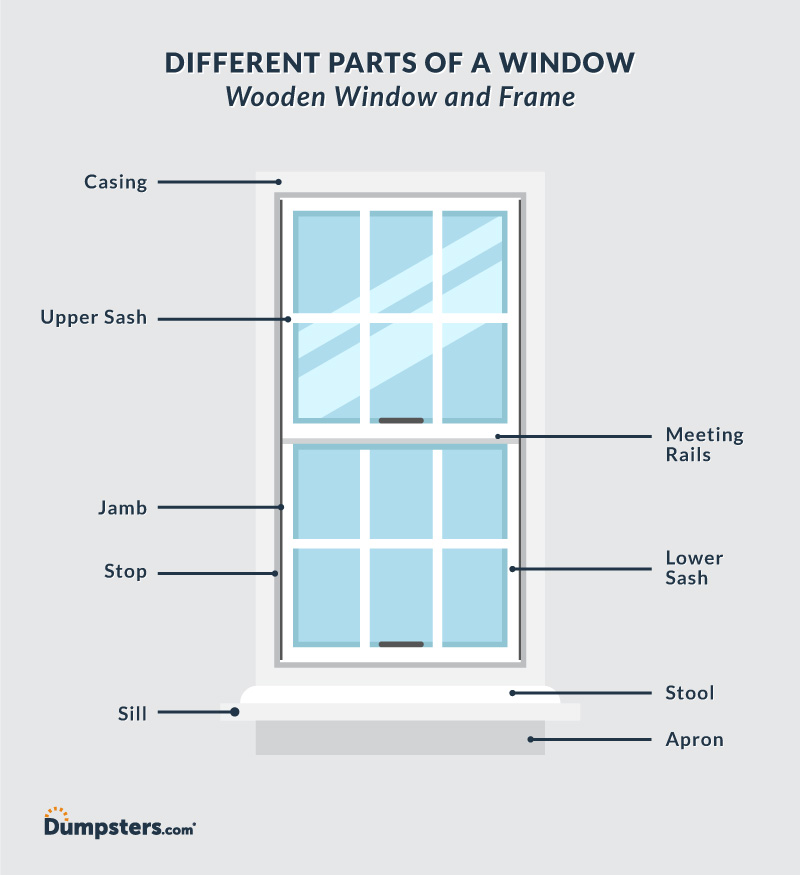
You wouldn't build a home without a set of blueprints, so why would you take out a window without knowing all the parts first? Our infographic tells you everything you need to know about windows, from jamb liners to sashes and everything in between.

Anatomy of a Window: A Glossary
- Apron: A decorative piece located below the sill. Not included with all windows.
- Casing: The trim pieces surrounding the frame.
- Jamb: The vertical sides of the window frame. May or may not have a track built in.
- Meeting rails: The spot where the two sashes meet and prevent each other from passing.
- Sashes: The upper and lower assemblies that slide to open and close and hold the window pane.
- Sill: The bottom horizontal part of the frame, often sticking out a bit further than the other sides of the frame to form a ledge.
- Stool: A horizontal piece of trim at the bottom of the window. It sits above the sill.
- Stop: The strip that runs along the window to keep the sashes from coming off the track.
2. Gather Supplies
There may not be a ton of tools needed for this job, but you’ll want to have them all collected before you get started. You may already have most of the tools and supplies if you have done home projects before, but they're also easy to pick up at a hardware store.
Wood Window Removal Tools and Supplies
Tools | Supplies |
|---|---|
Pry bar | Plastic sheeting/drop cloth |
Chisel | Gloves |
Hammer | Goggles |
Screwdriver | |
Box cutter |
Need a dumpster to handle the mess?
Get a Price and Place Your Order Give Us a Call to Learn More
3. Prep the Area
It's almost time to get started. First, though, you'll want to get the area staged for success. Start by clearing about six feet of space around the window. This will help give you space to move and place the parts of the window as you remove them. Once the area is cleared, lay your plastic sheeting or drop cloth below the window to catch any debris and dust.
You should also cover any vents near the area and consider covering electrical outlets with tape or childproof covers to ensure that any dust you kick up doesn't get into them.
4. Remove Stops
Use your box cutter and chisel to score areas where paint, caulk or any other sealant connects the window to the casing.
Next, use your pry bar or chisel and hammer to pull the side stops off. Then, do the same for the head stop.

Keep in Mind
With the stops removed, you’ll have access to the trim. While not required, if you plan on removing the trim as part of your window replacement, now is the time to do it.

5. Take Out Sashes
Now it’s time to get the bulkiest part of the window out of the way. Removing a wooden window sash is simple enough once you know what to do.
- Open the lower sash about 4-5 inches.
- Push firmly against both jamb liners at the top of the open sash.
- Pull the lower sash toward you until it’s rotated 90 degrees in the frame.
- Lift one side of the sash until the tilt pin disengages.
- Rotate the other side of the sash the opposite direction until that tilt pin disengages.
- Remove the sash.
- Repeat these steps for the upper sash.
6. Remove Jamb Liner
The last step is about as simple as the first. Take your pry par or chisel and hammer and carefully pry the jamb liner on both sides from the casing.
In the event you plan on reusing the jamb liners for new windows, be sure to pry every couple of inches for the height of the window until the liner is completely removed. If you aren’t planning on reuse, you only need to pry a few inches along the bottom of the jamb liner, then pull it out. It will cause the liner to be unusable, but will move the project along much faster.
Replace Your Windows for a World of Opportunity
Whether you’re looking to become more energy-efficient or give your home a new look, removing your windows is a great place to start. It not only gives you a new appreciation for the purpose of your windows, but helps save you some money in the overall project. But what’s next? Whether you plan on replacing the windows or will be finishing the wall, removing the windows is the first step to a whole new look in your home.
Other Sources
Window Replacement Cost Calculator. (n.d.). Retrieved from Modernize.com
What Do You Think?
Are you updating your windows? We're listening. Head over to Twitter or Facebook,
and use #dumpstersblog to join the conversation.


