How to Insulate a Garage in 6 Steps
A DIY guide to insulating your garage in one day.
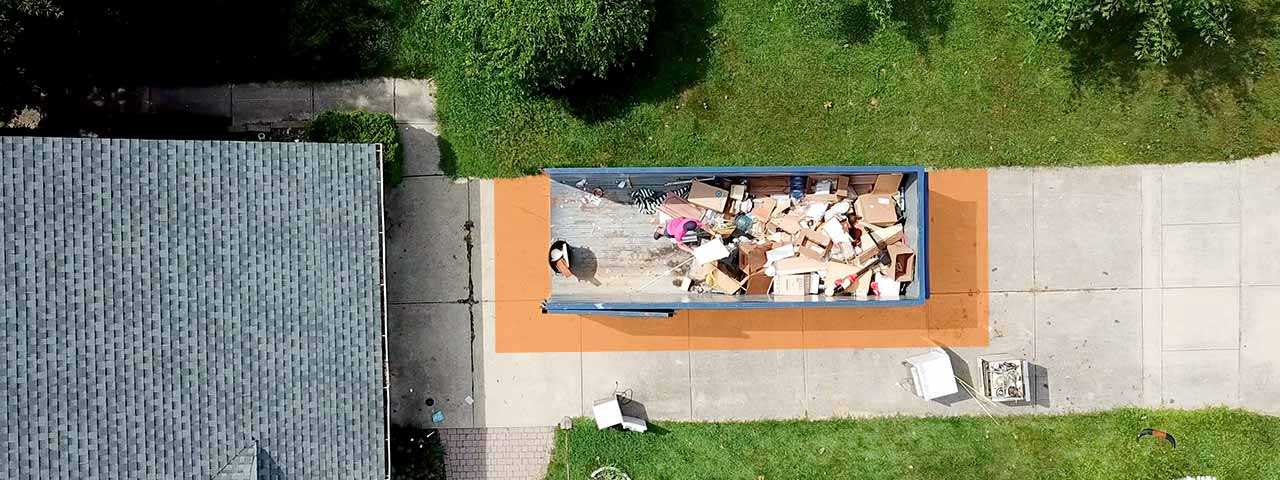
Make cleanup a breeze with a roll off dumpster:

A Step-by-Step Guide to Insulating a Garage
Maybe you need a warmer (or cooler) place to work on DIY projects or you’re building a home gym. Whatever the reason, we collected expert tips from Bryan Sebring at Sebring Design Build to help you learn how to insulate your garage.
How Much Does It Cost to Insulate a Garage?
The cost to insulate a garage averages $1,500 to $6,700 for a two-car garage. The total cost of your garage insulation project depends on:
- Your garage size
- Type of insulation
- Labor costs
- Location
- Permits
Are you a seasoned DIYer? Tackling your insulation project yourself will help you save on labor costs. Professional insulation installers typically charge between $40 and $80 an hour.
Garage Insulation FAQs
Can I insulate my garage myself?
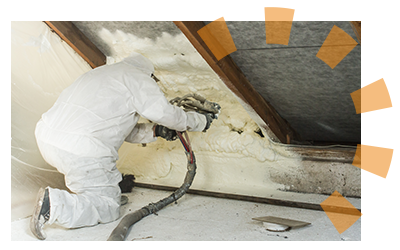
Yes, you can insulate your own garage. We recommend using fiberglass insulation, since this type is easier to handle and can be used throughout the entire garage, including the walls, floors and ceiling. If you plan to use a different type of insulation, we suggest hiring a professional, since other materials can require more experience.
Should I rent a dumpster for my garage insulation project?
Having a roll off dumpster nearby is a great idea when insulating a garage. In addition to scrap pieces of insulation, there may be minor DIY repairs that you'll complete while installing the insulation. Just throw all the debris into the dumpster to keep your workspace clean and safe.
Ready to get a dumpster? Order online today.
What kind of insulation is best for a garage?
The most common insulation used in a garage is fiberglass insulation, which consists of extremely fine glass fibers with a paper face on top of it. It is often sold in rolls or bags and looks fluffy.
Fiberglass insulation comes in different R-values, which measure how well certain building insulation materials resist heat. The greater the R-value, the greater the ability to insulate.
Does insulating a garage door make a difference?
Insulating your garage door can make a big difference, especially if you're planning to use it as a workspace. It'll help keep your garage around the same temperature and prevent your HVAC unit from overworking during the coldest and hottest weather of the year.
Which R-value should I use for garage insulation?
- Most older homes were built with 2x4 studs. (A stud is a vertical framing piece in a wall. It’s also often referred to as a 2x4). For these, use R-13 insulation.
- Some newer homes (built in the last 10-15 years) were built with 2x6 studs. These require R-21 insulation.
- Use R-40 thick insulation for the ceiling.
What is the best way to insulate a garage?
The best way to insulate a garage is with fiberglass insulation, which you can buy in precut rolls or batts. You can use this insulation in the walls, floor and ceiling. To install fiberglass insulation:
- Staple the paper face of the insulation to the side of the stud, not the face of the stud. You’ll need to leave the face of the stud exposed to install the drywall on top of the insulation.
- Put a piece of wood on top of the insulation to use as a guide to cut the insulation to the right size.
- Use a utility knife to cut excess insulation so it fits the size of the stud.
- Tuck the insulation in and staple it all the way down the side of the stud.
Should you insulate your garage ceiling?
Insulating your garage ceiling can help regulate temperatures in both hot and cold weather, especially if your home has a room above the garage. It can even save you money on air conditioning during the summer since insulation helps block heat from other rooms in your home.
Order a Dumpster Online
Shopping after hours? Too busy to make another call? Book the dumpster you need, when you need it. Order your dumpster online 24/7.
How Do I Prepare to Insulate My Garage?
We can recommend which type of insulation to use and how to install it, but you’ll need to determine how much of each material you’ll need for your particular garage. Below are some guidelines for determining the quantity or type you’ll need of each material.
- Tools: To do the job yourself, make sure you have a screwdriver, drywall screws, utility knife and staple gun.
- Fiberglass insulation: To find out how much insulation you’ll need, measure the linear feet around the entire room and multiply it by the height of the room to get the square footage. We recommend buying an extra unit of insulation. You can always return it if you don’t use it.
- Garage door insulation kit: You don’t have to use a kit for the garage door, but we recommend it.
- Expanding foam: If you have gaps and cracks in your wall, you’ll need to fill them in to make sure outside temperatures don’t creep inside. Expanding foam comes in a low-expanding and high-expanding form. The kind you buy will depend on how big the spaces in your wall are.
- Drywall: The same measuring technique and purchasing recommendation as insulation applies.
- Gloves and long sleeves: Fiberglass can irritate your skin. We suggest wearing gloves and clothing for protection.
What Type of Insulation Should I Choose?
There are several types you can use, but Sebring recommends using fiberglass insulation sold in rolls or batts (precut sections) since it's the easiest DIY choice.
Advantages of fiberglass insulation:
- Easy to handle and use between framing.
- Can be used in all areas – floors, walls and ceilings.
If you’d prefer using a different type of insulation, he suggests hiring a professional. Some materials are harder to find, more expensive and require more experience to install.
Types of Insulation and Their Disadvantages
Insulation Type | Disadvantages | ||
|---|---|---|---|
Rockwool batts and blankets |
| ||
Cotton batts |
| ||
Loose-fill fiberglass |
| ||
Loose-fill cellulose |
| ||
Polystyrene structural insulated panels |
| ||
Polyisocyanurate structural insulated panels |
|
What Are the 6 Steps to Insulate a Garage?
Insulating your garage takes six easy steps, including clearing the walls, checking for cracks, installing the insulation, applying drywall, and insulating the ceiling and door. Find out more about each step below.
1. Clear the Walls
The first step to insulating your garage is to clear the walls of any tools, shelving or other personal items and remove the drywall. In order to effectively install insulation, you need to be able to see every part of the wall so you can fix any damage.
- Remove any tools or equipment you have hanging on the walls.
- If your garage has drywall, remove it. Consider renting a residential dumpster to toss it away.
- Make sure to clear up any dirt and clear out the stud cavities.
- Look for mold and clean up any chemicals in the garage, like gasoline or fertilizer. Find your nearest hazardous waste collection center to safely dispose of these materials.

2. Look for Gaps and Cracks in the Wall
Before jumping into installing your insulation, it’s important to fix any major problem areas so you don’t run into issues after installation.
- Get your expanding foam and vigorously shake it for about one minute.
- Attach the straw to the can and hold it upside down to spray it in the openings.
- Only fill gaps about 50% full. The foam will continue to expand and fill the space.
- Give it about five to 15 minutes to continue expanding and become tack-free. It should be completely cured — or hardened — in eight hours.
3. Install Fiberglass Insulation
Now it’s time to add your insulation. With new insulation, you can enjoy a more comfortable and energy-efficient garage.
- Staple the paper face of the insulation to the side of the stud, not the face of the stud. You’ll need to leave the face of the stud exposed to install the drywall on top of the insulation.
- Put a piece of wood on top of the insulation to use as a guide to cut the insulation to the right size.
- Use a utility knife to cut excess insulation so it fits the size of the stud.
- Tuck the insulation in and staple it all the way down the side of the stud.
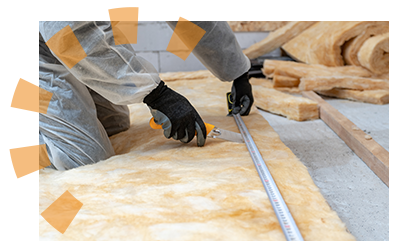

4. Cover the Insulation With Drywall
Once you’ve finished adding your insulation, you need to replace the drywall you removed in step 1. Drywall not only helps your walls look more aesthetically pleasing but adds fire protection, structural support and sound reduction.
- Coarse-thread drywall screws work best with drywall.
- Screw and glue drywall to the stud.
- Place screws approximately every eight inches.
- Do not leave the paper of the insulation exposed. This is a fire hazard.
5. How to Insulate a Garage Ceiling
Don’t forget the ceiling! Insulating your ceiling ensures you can reap those energy-efficient benefits. Say goodbye to drafts and outrageous temperatures.
- Use thicker batt R-40 insulation.
- With a staple gun, install rafter vents on top of the rafters. Staples should be approximately 8-10 inches apart.
- Cut insulation to fit between the rafters and shove it into position with the paper side down.
- Repeat across the entire ceiling and ensure there are no gaps or crevices when done.

Pro Tip
Cut rafter vents to match the size of the insulation and pre-cut the pieces you’ll need. This will help while you’re up on the ladder. Also, consider asking someone to help pass tools and materials up to you to avoid heavy lifting or losing balance.
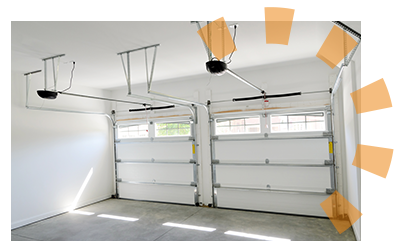
6. How to Insulate a Garage Door
Lastly, you need to insulate your garage door. Just like your ceiling, your door is an area you don’t want to forget. Insulating your door reduces energy use, keeps your garage a comfortable temperature and adds an extra layer of protection.
- Determine if your garage door is constructed of steel, wood frame-and-panel or flat.
- Cram flexible insulation in the frames around the panels or squeeze pre-cut foam board insulation into the frames for a steel door.
- For wood frame-and-panel, cut and secure stiff insulation into the recesses between the door frames.
- Foam board is the best fit for flat garage doors. Just tape or glue the insulation to the door.
- Keep in Mind: Insulating the garage door means you’re adding weight to it. You may need to change the springs to retain tension and balance so it closes properly.
Expert Contributors
Bryan Sebring
Bryan is the president and founder of Sebring Design Build, a remodeling and home building company founded in 1999. Sebring Design Build originally began in Illinois and has since expanded to the Nashville suburbs of Franklin and Brentwood. Bryan has been working in the construction industry since 1993.
Other Sources
All About Insulation R-Values. Retrieved from The Home Depot
What Do You Think?
Was this guide helpful for your garage insulation project? We're listening. Head over to Twitter or Facebook, and use #dumpstersblog to join the conversation.


