Plan Out Your Laundry Room Renovation
Complete your DIY laundry room renovation in just nine simple steps.
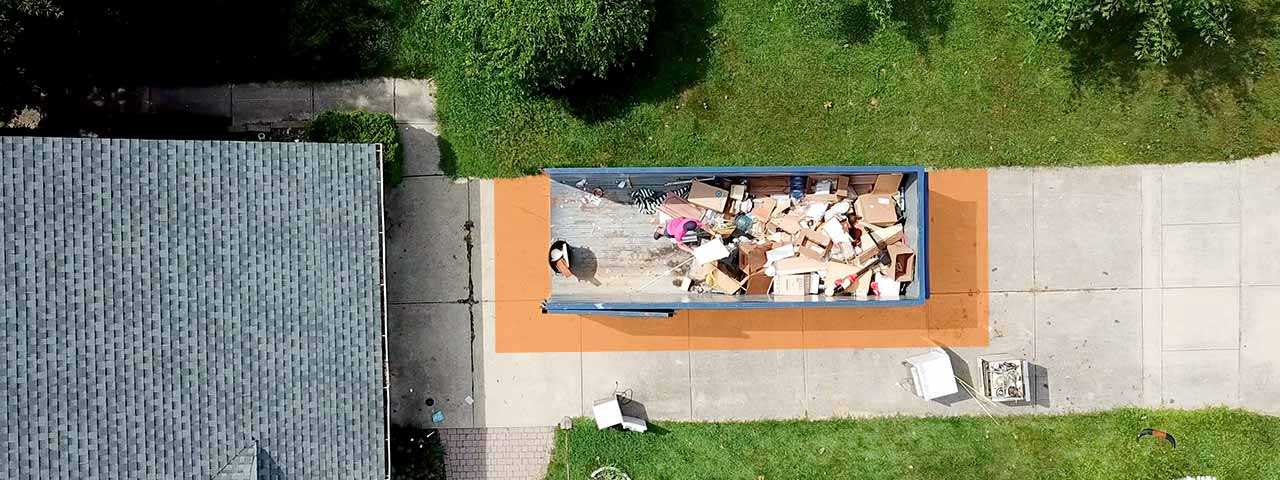
Make cleanup a breeze with a roll off dumpster:
A Complete Guide to Your Laundry Room Remodel
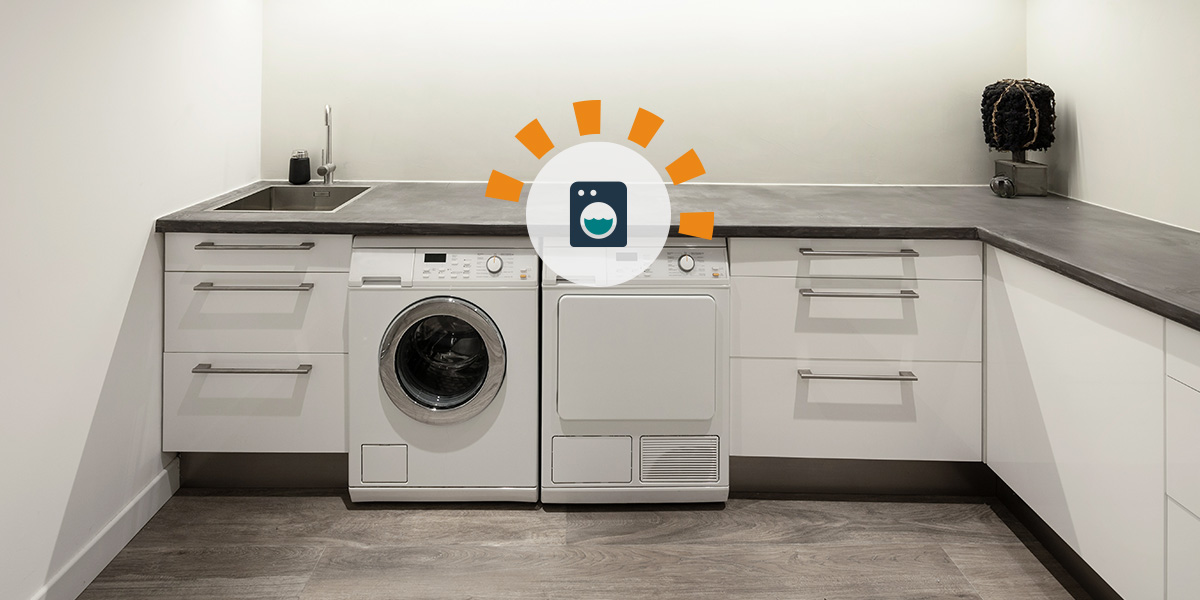
You probably use your laundry room at least once a week, but it’s likely towards the bottom of your list when it comes to home renovations. However, because you spend so much time in this room washing clothes, it’s worth giving this space an update. We’ll help you create a room that functions well and looks just as nice so you can get your laundry done efficiently in an area that reflects your style.
Learn how to renovate your laundry room with expert advice from Armstrong Flooring, Moen, Electrolux, Maytag, International Association of Certified Home Inspectors and Kohler.
Laundry Renovation FAQs
Expect to pay as low as $1,300 if you plan to DIY your laundry room renovation by adding simple upgrades like flooring or appliances. If you prefer a contractor or extensive remodel, such as room expansion in addition to the major overhaul, you can pay upwards of $15,000.
The bigger the laundry renovation, the more value it will add to your home. That's to say, if you're just swapping out fixtures and updating the flooring it won't bring the value up by much. However, if you're adding plumbing, more storage space and countertop space, you should see a healthy increase in your home's resale value.
Stock cabinets cost anywhere from $250 and $2,000 to add to a laundry room. That's $50-$400 per linear foot.
In contrast, custom cabinets can run you approximately $750 per linear foot.
Order a Dumpster Online
Shopping after hours? Too busy to make another call? Book the dumpster you need, when you need it. Order your dumpster online 24/7.
Renovate Your Laundry Room From Top to Bottom
There’s more to updating your laundry room than simply selecting a new washer and dryer. From changing up the layout to adding more storage, use the following steps to transform your laundry room.
Renovate a Small Laundry Room
Are you tight on space but still looking to update your laundry room? That's no problem. Not only is working with a smaller room quicker, it's easier on your wallet too.
- You can make the space feel more open with a fresh coat of paint. Choosing light or pastel colors will give the illusion that your laundry room is larger than what it really is.
- Update the flooring. Whether you prefer tile, wood or vinyl flooring, replacing the old material will drastically improve the room (almost as much as painting it). Bonus: painting the trim or outright replacing it is a quick way to change things up.
- If you can't go wide, go up. That is, take advantage of the vertical space in your laundry room. Installing shelves or cabinets, or even hanging a trendy mirror will help freshen up the room while also ensuring you're getting the most of your space.
- Lastly, consider new lighting. Lamp shades, bulbs or a modern chandelier can add a lot of character to the room without taking up much space.

Step 1: Design and Plan Your Laundry Room Remodel
Before diving in, take some time to think about why you’ve decided to remodel your laundry room, and use that to influence your planning process. Are you looking to update the room’s aesthetic? Do you need to enhance the flow of the room to increase functionality? It’s also important to think about the existing space you have – can you work within the confines of the current walls, or do you need to open it up or move the room to an entirely different part of the house? Take time to thoroughly plan your renovation so you’re prepared and end up with a final product you’re happy with.
Create a Layout That Works for You
As you design your new-and-improved laundry room, the most important things to account for are space for the appliances and a logical workflow. Think about how you normally do laundry as you plan the layout.
Consider these questions:
- Should you have a folding station next to or on top of the dryer?
- Where will you keep the laundry baskets?
- Do you need space for a hanging rod?
- Do you need a spot for an ironing board or steamer?
- Does the room provide enough natural light, or do you need to add a window or light fixture?
- How will cabinets factor in to the design?
- Will you need to move plumbing and electrical for the appliances or to add a sink?
Other design elements include the colors you choose for the cabinets and walls, and the hardware for the cabinets. Along with that, you’ll need to decide whether or not to include open shelving and if you’d like to install a tile backsplash behind the sink.
Pick the Right Materials
While choosing materials that express your style is important, also remember that this is a high trafficked room that is likely to endure water, detergent and bleach spills. Check out our recommendations below.
Laundry Room Flooring Options
The flooring materials you choose should be resilient and durable. Find something that’s water-resistant and low-maintenance. We recommend wood-patterned laminate, vinyl or ceramic tile. These materials are also good choices considering the high humidity that occurs in the laundry room, as opposed to wood floors, which could buckle.

“Vinyl sheets and vinyl planks are common choices for laundry rooms. Because most laundry rooms are relatively small, you’ll likely only need one sheet of flooring. Planks are a fairly easy option for people who aren’t expert DIYers, because they fit together like puzzle pieces.”
Storage Possibilities
You have a few choices when it comes to storage in the laundry room. You can go with cabinets, open shelves, cubbies or a combination of these. Whatever you choose, be sure to take measurements of the laundry room to get the right size storage.
Here are some characteristics to keep in mind as you’re choosing which storage style to go with:
Storage Option | Features to Consider |
|---|---|
Wall cabinets |
|
Base cabinets |
|
Open shelves |
|
When it comes to selecting the actual material for whichever storage option you choose, wood cabinets are often the most popular, but, as mentioned with flooring materials, keep in mind this is a room that experiences humidity. If you decide to use wood cabinets, make sure they have a good sealing layer or they may warp. It’s also a good idea to choose hardwood, which is more durable than softwood.
Considering the potential damage hardwood cabinets may experience, try a different material, like rubberwood, plywood or veneer. Rubberwood is one of the cheapest material options to choose from. Plus, it doesn’t stain easily, you can clean it with just soap and water and it doesn’t discolor. Plywood is also a low-cost option with good stability. It’s easy to clean with a soft cloth and water and it doesn’t fade or discolor easily. Finally, veneer is stable and lightweight.
Countertop Ideas
When it comes to selecting countertop materials, like everything else, remember that it’s possible you’ll spill laundry liquids on them. The counters are also likely to come in contact with grease, dirt and other debris from your clothes. Go with a durable and non-porous material, like quartz. When it’s dirty, you simply need to wipe it down.

Keep in Mind
Materials like marble, limestone, granite and butcherblock, while trendy, require regular sealing, so they may not be an appropriate option for this room.
Sink Selections
If your budget and space allow for it, consider getting a deep sink to easily soak clothes or hand wash delicate items. Stainless steel is typically a better choice than a plastic laundry tub because it’s less likely to leave marks and is easier to clean.
Here are some design style tips from Moen to keep in mind as you’re choosing a sink:
- Farmhouse sinks add a rustic touch while copper sinks add metallic punch.
- Stainless steel is popular among customers looking for a wear-resistant finish that stands up against chipping, cracking, staining and peeling.
- Granite sinks can be a real statement piece. You can find a variety of finish options to cater to different décor styles.
- Drop-in sinks are more common with laminate or synthetic materials, typically include a lower price point and are usually easier to replace when the time comes.
- Undermount sinks are often used with materials like granite, offer easier maintenance and have a more seamless look.

“The key is to choose a sink that fits your needs in the laundry room. If you’re constantly rinsing stains out, you may want to select a larger bowl sink.”
Another feature to consider when deciding on a sink is choosing the right laundry faucet. According to Ed Del Grande from KOHLER, laundry faucet features should include form and function and should be easy to service.

“You want the faucet to match the laundry sink design and quality level. Also, look for a faucet finish that’s scratch-resistant and easy to keep clean. Having a faucet that can be easily serviced down the road is helpful, so stick with a quality brand name with readily available replacement parts.”
Also look for sinks and faucets with up-to-date options. Some now include useful features like single-handle operation, tall faucet spouts, pull-out spray heads and water flow pause buttons, according to Del Grande.
Choose Your Laundry Room Appliances
Are you keeping your existing washer and dryer, or do you plan on buying new ones? If you’re springing for new appliances, take some time to consider if you’d prefer a side-by-side or stacked washer and dryer combo. The only real downfall to a side-by-side appliance combo is that they take up more space, so if you’re working within a small laundry room, keep that in mind. Also consider if you prefer front-loading machines or top-loaders.
Pros and Cons of Stacked Washer & Dryer
Pros | Cons |
|---|---|
Compact size | Load sizes tend to be smaller |
Generally quieter than side-by-side models | May be too high for some |
Use electricity - don't need to vent dryer | Electricity costs more to run than gas |

“When choosing a washer, keep in mind that front loaders are more efficient. They use significantly less water per load and are more effective at cleaning. For dryers, check for a variety of cycles, like quick dry and quick refresh cycles. Be sure to check out consumer and expert reviews before making a final decision.”
As far as colors are concerned, it’s usually best to stick to classic finishes like black, white or silver. If you go for a bold color, make sure it’s something you absolutely love – you don’t want to get sick of looking at it over time. You might also consider switching to energy-efficient appliances.

“Choosing the best washer and dryer for you depends on a number of things, like the space you have in your home for a laundry pair (either side-by-side or stacked), family size, how frequently you do laundry, etc.”

Step 2: Create a Budget
The average laundry room remodel cost is $6,000, but can range between $800 and $12,000. This includes the cost of mid-range upper and lower cabinets, laminate countertops and front-loading appliances in a 35-square-foot room.
Decide how much you’re willing to spend as you start planning, and keep that figure in focus as you look at different materials and design the room’s layout. Start with the biggest expenses, like appliances, countertops and flooring, to make sure these key features make it into your budget. Once you’ve factored in the most important prices, you can spend any extra money on making the room look nice and adding in extra features, like buying new paint and accessorizing the room with personal touches.

Pro Tip
Research different price points for appliances and materials to find the ones that work best for your budget. A new washer and dryer alone can cost a couple thousand dollars.
Laundry Room Remodel Material Costs
Feature | Average Cost |
|---|---|
Vinyl flooring | $2-$8/sq.ft. |
Quart of paint | $5-$10 |
Stock vs. custom cabinets | $100-$280/linear foot vs. $2,000-$4,500 |
Laminate countertops vs. granite or quartz | $50-$500/sq.ft. vs. $600-$1,000/sq.ft. |
Washer & dryer | $800-$4,000 |
Undermount vs. utility sink | $100 vs. $1,000 |
If you don’t plan on doing all the renovation work yourself, another important price factor is labor. Expect to spend about a third of your budget to hire a professional. You should also budget for waste removal, regardless of who does the work. The average price to rent a roll off dumpster is $458.66, but the exact price varies based on location, container size and debris type. Having a dumpster on-site gives you a convenient place to toss all your debris as you work and prevents you from having to take multiple trips to the landfill yourself.
Average Labor Costs
Professional | Price Point |
|---|---|
Plumber | $45-$150/hour |
Electrician | $65-$85/hour |
Carpenter | $70/hour |
Painter | $50/hour |
Flooring installer | $5-$10/sq.ft. |

Step 3: Prepare for the Laundry Room Renovation
There are a lot of things to take into account as you get ready to remodel. From collecting the correct tools to figuring out which laundry room renovation projects are DIY-worthy, we’ve outlined all the prep work so you can dive in with confidence.
Get the Right Tools
You’ll need to gather a range of tools to help you with the various demolitions that will take place over the course of your laundry room remodel, and work gloves and safety goggles should be worn during all tasks. We’ve assembled a few different recommended tool lists based on the upcoming projects you may have to tackle.
Tools to Gather by Project
Tools:
- Ladder
- Screwdriver
Tools:
- Chisel
- Putty knife
- Caulk softener
Tools:
- Caulk softener
- Putty knife
- Box cutter
- Screwdriver
- Pry bar
Safety Gear:
- Work gloves
+Safety goggles - Long pants
- Sturdy shoes
- Knee pads
- Face mask
Vinyl & Linoleum Tools:
- Chisel
- Pliers
+Flat pry bar - Utility knife
- Putty knife
- Heat gun
Hardwood Tools:
- Circular saw
- Pry bar
- Mallet
- Tile Tools
- Chisel
- Hammer

Pro Tip
If you’re knocking down a wall during your laundry room renovation or adding new electrical and plumbing, you’ll need to obtain a permit from the city. If you rent a residential dumpster for waste removal during demolition and need it delivered in the street, you’ll need a dumpster permit as well.
Prep the Room
Put up plastic sheets over the doorway to contain dust from the demolition. Then, cover air ducts to prevent dust from going to other rooms in the house or clogging the furnace. If the room has a window or a door leading outside, open it and use a fan to direct dust outside.
Decide What to DIY and What to Hire Out
You can probably do some of the renovation work yourself, but be realistic about your abilities. Make sure you know what you’re doing before diving in. If you’re knocking down walls, it’s probably best not to try that yourself. If you’re installing or moving plumbing and electrical, definitely hire a professional. Learn more about whether to hire a pro or DIY.
Laundry Room Renovation Tasks
Job | Do It Yourself | Hire a Pro |
|---|---|---|
Demolition | X | |
Plumbing | X | |
Electrical work | X | |
Install floor | X | |
Create custom cabinets | X | |
Install cabinets | X | |
Install countertops | X | |
Install sink | X | |
Paint | X | |
Install appliances | X |

Pro Tip
Keep in mind that the types of materials you choose and your level of expertise can impact your decision to complete the renovation on your own.
If you decide the work is out of your realm of capabilities, home renovation planning and contractor fraud expert Jody Costello says to keep the following three things in mind when hiring a contractor:
- Vet the contractor by doing a background check that goes beyond just referrals and license checks. Having a license does not guarantee quality work or ethical business practices. Referrals alone, without doing some research on the company, aren’t always reliable. Ask if they’ve performed work similar to yours, and check online for complaints, lawsuits and lien history to get a better picture of their operations.
- Research your state’s down payment laws and acceptable payment schedules, and never pay cash or a large sum of money upfront.
- Protect yourself against “surprise invoices” that are not part of your written agreement. Always require a written change order that is agreed to by both parties, signed and added to the overall cost of the project.

Step 4: Demo the Existing Space
It’s time to get your hands dirty. Grab your tools and don’t stop until you’re left with an empty laundry room to make over.
Remove the Washer and Dryer
It’s important to get the washer and dryer out of the way first. They’re bulky, so getting them out of the room before it’s cluttered with debris will be easiest. Plus, if you’re reusing, selling or donating the appliances, you don’t want to ruin them. The safest and quickest way to uninstall the machines is to hire a professional, but it is possible to do yourself. Follow our steps below to guide yourself through the process.
How to Remove a Washing Machine
- Unplug the machine.
- Turn off the water.
- Disconnect the water supply hose.
- Uninstall the drain hose.
- Check for any damage. Make sure there’s nothing that can injure you before moving it.

Pro Tip
Run a wash cycle before you unplug the appliance to make sure there’s no water left in the machine. Water will add weight and make the process messy.
How to Remove a Dryer
- Turn off the power or gas, depending on the type of dryer.
- Unplug the appliance.
- Disconnect the dryer vent hose.
- Watch for lint and dryer vent blockage.
Note: If you’re removing a gas dryer, set an appointment with the gas company. They’ll need to finish the uninstall process.
If you don’t plan on reusing your washer and dryer, check out our appliance disposal guide to help you get rid of the machines.

Safety Tip
Be careful! Gas is dangerous and flammable. Bring in the local gas company if you’re nervous about doing this yourself. It’s not worth trying to figure it out on your own, especially if you need to remove a gas line.
Take Down Cabinets
Pulling your cabinets off the wall is a two-person job, so make sure you have an extra set of hands before you get started. Have one person hold the cabinet doors while the other person unscrews the hinges to prevent them from falling on the floor. Next, find all the screws attaching the cabinet to the wall and any cabinets next to it. One person should support the cabinet from below while the other removes each screw.
Get Rid of the Sink
Removing a sink is another two-person job. Sinks can be heavier than you might think, so enlist help before you get started.
Use a chisel or putty knife to wiggle the sink away from the countertop. Spray caulk softener to remove dried adhesive or mortar under the rim of the sink. Then, carefully lift the sink up.
Detach the Countertops
By now, everything should be cleared out of the way and the water, gas and electrical should be disconnected after removing the appliances. Start by spraying the adhesive around the edges of the countertop with caulk softener. Let it sit for an hour, then use a putty knife or box cutter to pull the adhesive around the counters from the backsplash or the wall. Carefully pry the countertops away until it’s loose enough to lift.
If there are cabinets under the countertops, check to see if they are held in place with screws or another adhesive agent. If so, use a screwdriver or pry bar to unfasten or lift the countertops.
For a more in-depth guide, check out our step-by-step process on how to remove countertops.
Lift Up the Floors
How you remove your floors depends on the type of material you have. Use the following instructions as a guide to life up vinyl, linoleum, hardwood or carpet to give yourself a fresh surface to build your new laundry room on.
How to Remove Vinyl & Linoleum
- Use a chisel or pry bar to gently pull the baseboards away from the wall. Remove any nails with pliers.
- Measure 10 inches away from the wall and make a parallel cut through the flooring using a utility knife. Continue to cut strips to remove the center of the flooring.
- Loosen the edge of the floor near the wall with a prybar, then use a chisel or putty knife to chip away at the adhesive.
- Pull firmly back to peel the floor away, then cut off the loose strips with a utility knife.
- Remove the remaining adhesive using a heat gun and a putty knife.
For more in-depth help, use our vinyl or linoleum flooring removal guide.
Removing Hardwood Floors
- Use a circular saw to cut lines perpendicular to the direction the wood is laying, being careful not to damage the subfloor.
- Tear out the wood with a pry bar and mallet.
Read our wood flooring removal guide for more detailed steps.
Steps to Remove Tile Floors
- Use a hammer or chisel to break up one of the tiles near the door.
Continue around the next tile and pop it free with the hammer. - Repeat this process until every tile is free.
Get a full list of steps and tips in our step-by-step guide on how to remove tile.

Step 5: Put Down New Floors
Laying down new floors should be the first task when you start adding materials back to the laundry room, because everything else will be built or placed on top of this. How you install new floors depends on the material you choose, but here are some general tips from Armstrong Flooring to keep in mind.
- Know the product. Do your homework and familiarize yourself with the installation procedure for your chosen material. Decide if this is something you can do yourself or if you should hire a pro.
- Prep for the installation. Prepare the subfloor, make sure you have the right tools and find out if you need to acclimate the product to your home before installing.
- Look for a company with customer service. Get your flooring from a group that offers live help and customer support in case you get stuck during the installation process, especially if you’re not an experienced DIYer.
Check out our steps for DIY tile installation to lay down a durable and resilient flooring for the laundry room.

Step 6: Install Cabinets, Countertops and Sink
Keep these tips in mind as you’re building up your new laundry room to avoid any hiccups and create the best space possible.
Mount the Cabinets
Be sure to leave enough space between the countertop and cabinets so you can comfortably fold laundry, but not so high that you can’t easily reach supplies. Also leave room for anything else you plan on installing between the cabinets and counters, like a hanging rod for clothes. We also recommend keeping cabinets close to the appliances so you can reach detergent, bleach and whatever else you need as you’re doing laundry.
Put the Countertops in Place
If you chose front-loading machines, consider placing counters on top of your appliances as a space-saving measure and to create a convenient folding station. Leave space between the countertops and the appliances in case the washer and dryer need to be removed in the future. If you go with laminate countertops, use our countertop installation guide to successfully complete the job.
Place the Sink
Before installing your sink, make sure to shut off the water supply to avoid making a mess. If the room needs new plumbing, loop in the plumber in advance.

Step 7: Paint Your Laundry Room
Now that everything is in its place, it's time to bring the room to life with color. Pick your favorite colors and start painting.
Walls
First, wipe down all the walls to remove any lingering dust from the demolition and installations. Next, apply painter’s tape around the cabinets and countertops to keep the paint on the walls. Finally, dip your paintbrush and get to painting.
Cabinets
If your new cabinets need to be painted or you want to spruce up your old ones, start by cleaning them and removing all the hardware. Then, sand them down. Tape off anything you don’t want to get paint on, like you did for the walls. Apply a primer, then give the cabinets two coats of paint. Go for a semigloss, gloss or satin finish, because a matte finish is not as durable or easily wipeable.

Safety Tip
Ventilate the room while you paint, if possible, and wear a painter’s mask.

Step 8: Install Appliances
When you’re getting ready to install your washer and dryer, remember to leave enough room in front of the machines to place a laundry basket and to open the appliance doors if you’re using front-loading machines. Also leave a small gap on the sides and above the appliances if you’re installing countertops around them or placing them against a wall, so they can be easily removed if necessary.

Pro Tip
Before you install your appliances, set aside a day each for the plumber and the electrician if you’re moving around pipes and electrical lines.
The following steps outline the general rules for hooking up a washer and dryer, but read the instructions for your particular machines to make sure there aren’t any extra considerations to take into account.
Set Up Your Washer
- Turn the faucets on and clear debris from your valve screens.
- Move the washing machine near its final spot, leaving room to hook up the water supply.
- Attach the water supply hoses to their corresponding faucets.
- Connect the water hoses to their matching inlets on the back of the machine.
- Turn on the faucets and check the hoses for leaks.
- Fasten the drain hose to the washing machine and run it to the drain receptacle.
- Plug the washer in and move it into its final position.
Hook Up Your Dryer
- Check your dryer vent for debris and clean it.
- Set up the dryer near its permanent spot, leaving room to hook up the vent hose.
- Connect the vent hose to the machine.
- Clamp or slide the hose into the wall vent.
- Plug the dyer in and push it into place.

“Make sure your dryer vents through a smooth pipe to avoid link buildup, which causes fires, and vents outdoors, not into the wall cavity or attic space where moisture can lead to mold.”
Use a level to make sure both appliances are even with each other to prevent any damage to the machine or the floor when you run the appliances. Adjust the feet on the bottom of the machines if needed. Then, run each appliance to make sure they work properly.

Step 9: Decorate Your Renovated Laundry Room
Now that the room has been transformed and your appliances are ready to be used, it’s time to decorate your new laundry room. Personalize the space with laundry room signs, new hampers and baskets to hold laundry detergent, bleach and other materials. Make sure the items you get to hold materials are durable and not too expensive – they should withstand detergent and bleach accidents.
Ready to Renovate?
With a revamped aesthetic, hopefully your weekly chore will become a refreshing experience. Use this post to create the laundry room of your dreams and enhance the washing, drying and folding process.
Expert Contributors

Susan Stoeckl
Susan is an Installation Services and Maintenance Representative with Armstrong Flooring in Lancaster, PA. Susan frequently lends her expertise with companies like Lands Design to discuss the importance of evidence-based design and the role flooring plays in creating healing environments.

Matt Baranuk
Matt worked in Cleveland, OH for Moen as their Product Manager & Business Intelligence for over 3 years. He has strategically put together work experiences in multiple industries, departments and specializations to become an effective generalist and leader. Matt helps lead and influence organizations, as well as individuals, towards their goals through servant leadership practices, long-term sustainable strategies and cross-functional business understanding.

Ed Del Grande
Ed is not only a three-time Master Plumber, GBCI LEED green associate and contractor, he's well-known for his success as a TV host, author, nationally-syndicated columnist and media spokesperson. Stationed near Providence, RI, Ed was born and raised in a family-owned plumbing business, and has 30+ years of experience in every aspect of construction.

Eloise Hale
Eloise has been the Corporate Communications Executive at Electrolux for over 10 years. She's responsible for overseeing and executing strategic communications for Electrolux North America while also supporting global communications for AB Electrolux, including media and investor relations from her home in Charlotte, NC. Eloise also oversees all North American media, government and community relations, employee engagement and strategic events.

Nick Gromicko
Nick works out of Boulder, CO for the International Association of Certified Home Inspectors. He's also the host for Inspector Show and is determined to make sure that every home inspection in the world is performed by an InterNACHI member or a Certified Master Inspector.
Other Sources
How Much Does a Laundry Room Addition or Remodel Cost? (January 24, 2022). Retrieved from Angi.com
How Much Does a Laundry Room Addition or Remodel Cost? (January 25, 2022). Retrieved from HomeAdvisor.com
Laundry Room Remodel Cost. (July 13, 2021). Retrieved from Fixr.com
What Do You Think?
Has renovating your laundry room inspired you to share your experience? Head over to Twitter or Facebook,
and use #dumpstersblog to join the conversation.


