Step-by-Step Guide to Building a Dumpster Enclosure
Follow our 7-step guide to keep unwanted trash out of your dumpster.
Make cleanup a breeze with a front load dumpster:
Keep Your Business Clean With a Dumpster Corral
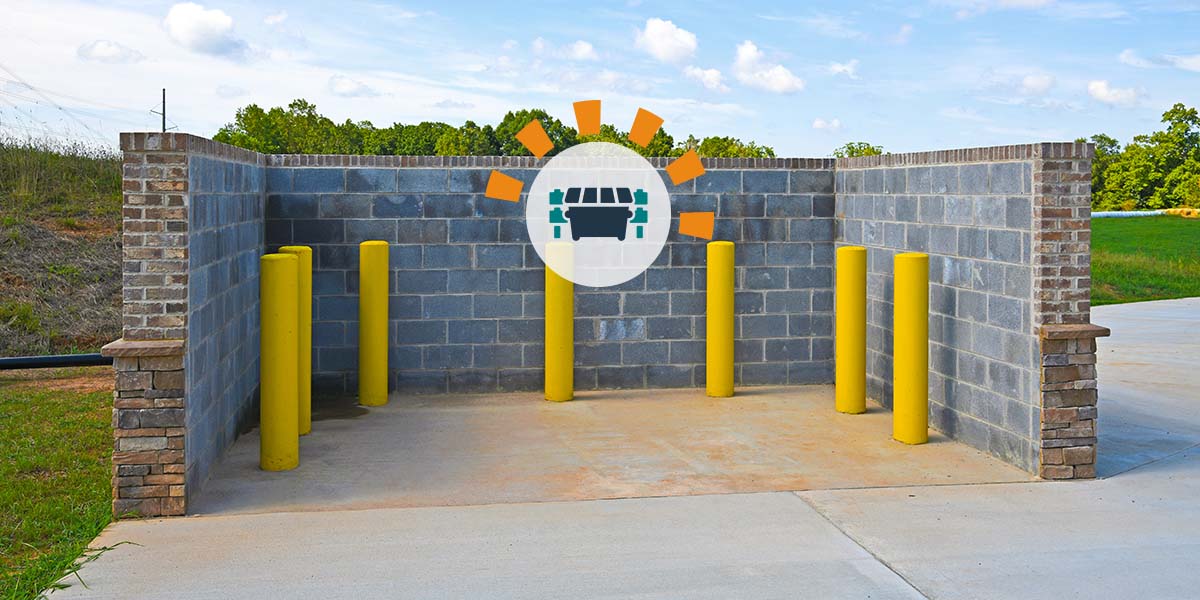
A good permanent dumpster service is necessary to keep your organization running efficiently, but your bins are better off hidden from your customers – not to mention the people who see them as their own personal dumping ground or the animals who may find your trash appetizing. Thankfully, building a dumpster corral can help with these problems, and we're here to show you how.
What is a Dumpster Enclosure?
A dumpster enclosure is a fenced-in area that allows you to hide your temporary or commercial container from view in order to keep your property looking clean and presentable. It also prevents trash from being picked up by the wind, animals from accessing your bin and strangers from illegally dumping in your container, which could cause you to rack up extra fees.
Dumpster Enclosure FAQs
How far does a dumpster have to be from a building?
Place your dumpster at least 50 feet from your building. If space allows, shoot for at least 100 feet from the closest entrance. Keep in mind that this may affect the dimension requirements for your enclosure.
Do I need a permit to build a dumpster enclosure?
Yes, you'll likely need to obtain a permit in order to add a dumpster corral to your property. Check your city's website for more information.
Should I get a fence for my jobsite?
It's a good idea to place a locked, temporary fence around a roll off dumpster or your job site while you work through a construction project or home remodel to keep unwanted guests from illegally dumping waste into your container.
How big should I make my dumpster enclosure?
A typical dumpster enclosure is:
8ft high
14ft long
19ft wide/deep
The gate opening should be 15ft. The gate itself should be able to swing more than 90 degrees, with an overhead clearance of 20ft. The truck length approach is usually 60ft.
Steps to Build a Dumpster Enclosure
When you're ready to build a dumpster corral, it helps if you go in with a plan. Use these steps to choose the right material for your enclosure, ensure you have enough space and successfully build your fence.
Prep
The last thing you want to do is go into the project feeling unsure. Here are some considerations to keep in mind as you prepare to build your corral and pick a dumpster enclosure design.
1. Choose a Material for Your Fence
Dumpster fences can be made out of several different materials. The chart below shows some pros and cons of each to help you choose.
Material | /////Pros | /////Cons | |
|---|---|---|---|
Wood |
|
| |
Vinyl |
|
| |
Chain Link With Slats |
|
| |
Metal |
|
| |
Concrete |
|
|

Pro-Tip
Some cities require dumpster fences be made out of a specific material. Check the regulations in your area by searching your local building department’s website or giving them a call.
How Much Does a Dumpster Enclosure Cost?
The cost of your dumpster enclosure will depend on the following factors:
- The material you choose.
- The number of dumpsters the fence is meant to contain.
- Whether you plan to build the enclosure yourself or hire a pro.
- Whether there's an existing concrete foundation on the property for the dumpster to sit on.

Keep in Mind
In addition to maintaining the aesthetic of your property, installing a dumpster enclosure is also a cost-saving measure. It protects your container from illegal dumpers who may toss the wrong materials in your bin or overload the container, resulting in extra fees.

2. Determine Dumpster Enclosure Dimensions
The dimensions of your dumpster enclosure will depend on the space needed for the dumpster itself, while also leaving enough room for employees to use your bin and for a garbage truck to pick it up. Dumpster corrals can be built with a variety of dimensions, but use the table below as a general starting point.
Each option comes with its advantages and disadvantages from time saved to mobility.
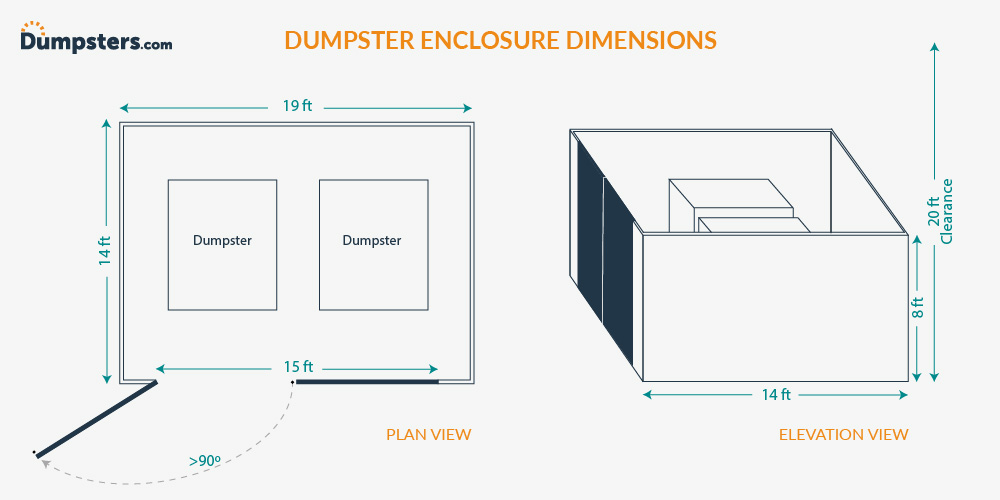
Height: | 8 feet |
Length: | 14 feet |
Width/Depth: | 19 feet |
Gate Opening: | 15 feet |
Gate Swing: | More than 90 degrees |
Overhead Clearance: | 20 feet |
Truck Approach Length: | 60 feet |

Pro-Tip
Some cities require their own dimensions for dumpster enclosures. Check with your local building department to find out if any rules apply in your area.

3. Pick an Installation Method
It’s tempting to try to save some money by putting up your enclosure yourself, but it may end up costing more in the long run if you make mistakes. Some types of dumpster corrals are better candidates for DIY installation than others.
Type of Fence | /////Do It Yourself | /////Hire a Pro |
|---|---|---|
Wood | X | |
Vinyl | X | |
Chain Link | X | |
Metal | X | |
Concrete | X |
Since you’ll likely be building your dumpster enclosure on a parking lot or other concrete surface, keep in mind, if you choose to do a DIY installation, you’ll need to rent a hammer drill to create post holes. Whatever surface you’re building your fence on, you’ll need to mix and pour concrete to make the posts sturdy. If you’re not up for either of those tasks, choose to use a pro installation no matter what type of corral you’re building. It’s much more cost-effective to get it done right upfront than to build a flimsy fence that can’t stand up to repeated use.
How to Build Your Dumpster Corral
Decided to DIY your dumpster enclosure installation? Read on for our handy instructions.
4. Make Post Holes
- Use a string line to mark the perimeter of your fence.
- Determine where the posts will go and mark where the center of each post will sit.
- Measure the width of your fence posts and multiply that number by 3. This gives you the diameter needed for your post holes.
- Draw a circle with the proper diameter around each of the center-post marks.
- Drill holes about one inch apart around the perimeter of each circle using a hammer drill. Then drill several holes within the circle. This will prevent spider web cracks from forming in the surrounding concrete during the next step.
- Switch to a chisel drill bit. This turns your hammer drill into a small-scale jackhammer to begin breaking up the concrete within the circle.
- Once all the concrete has been broken up and removed, use a post hole digger to create a hole 24 inches deep.
- Add a few inches of gravel to the hole for drainage.
- Repeat steps 6-8 for each post.
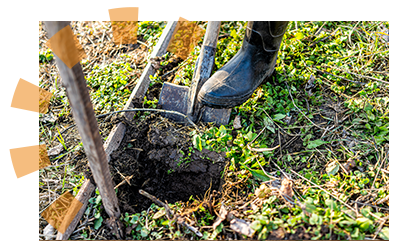

Important Safety Tip:
Always call Before You Dig at 8-1-1 before any digging project to make sure you’re not in danger of hitting utility lines. This protects you from potential injury and extremely costly damages.
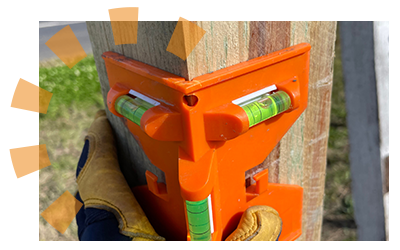
5. Dry Fit Posts
- Place posts in their holes. Brace them upright with 2 x 4s.
- Use a string line to ensure they all sit at the same height and are level.
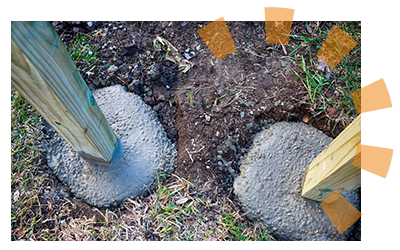
6. Pour Concrete
- Mix quick-set concrete in a bucket following the instructions on the package.
- Double-check that your posts are level and at the right height.
- Pour concrete to the top of each hole. Be careful not to let a dip form around the post.

7. Follow Your Dumpster Enclosure Directions
From here on out, simply assemble your wood or vinyl dumpster corral according to the manufacturer’s instructions.
Safe and Secure Dumpsters
Once you’ve installed a commercial dumpster enclosure, you can take out the trash without it being an eye-sore for your customers – or finding other people’s rubbish hitching a ride with the garbage service you pay for. Read more of our commercial waste disposal tips to help get rid of your business's trash without the hassle.
If you have more questions about sizing or placement for your dumpster corral, give our team a call at 877-880-5286. We’re here to help.
What Do You Think?
Have thoughts on commercial dumpster enclosures? We're listening. Head over to Twitter, Facebook or LinkedIn,
and use #dumpstersblog to join the conversation.

